 blog
How to Winterize Your Motorcycle in 5 Essential Steps
Last Updated: October 25, 2026
Quick Summary
Motorcycle winterization protects your bike from corrosion, rust, and fuel breakdown during months of inactivity by cleaning thoroughly, changing oil, stabilizing fuel, protecting the battery, and caring for tires. These five essential steps take a weekend and cost far less than emergency repairs.
- Wash your motorcycle completely and apply wax to painted surfaces to block moisture and salt that accelerate rust
- Change engine oil and filter before storage, as old oil contains acids and moisture that corrode engine internals
- Add fuel stabilizer to a nearly full tank and run the engine 10 to 15 minutes so treated fuel reaches injectors or carburetors
- Protect your battery by using a maintainer on an installed battery or removing it to store indoors in a cool, dry place
- Inflate tires to cold pressure slightly overinflated by 2-3 PSI and store your motorcycle in a dry location under a breathable cover
Table of Contents
- Why Motorcycle Winterization Matters
- Step 1: Clean Your Motorcycle Thoroughly Before Storage
- Step 2: Change Your Engine Oil and Oil Filter
- Step 3: Stabilize Your Fuel with a Motorcycle Fuel Stabilizer
- Step 4: Protect Your Motorcycle Battery for Winter Storage
- Step 5: Check Tires, Lubricate Moving Parts, and Choose Dry Storage
- Creating Your Motorcycle Winter Storage Checklist
- How to De-Winterize Your Motorcycle for Spring Startup
- Frequently Asked Questions
Why Motorcycle Winterization Matters
Motorcycle winterization is insurance against damage that costs far more to repair than to prevent. Learn how to evaluate a used motorcycle's condition before winterizing it to ensure you're starting with a solid foundation. When a bike sits idle for months, corrosion accelerates, fuel breaks down, batteries lose charge, and metal parts rust from the inside out.
Proper motorcycle winterization takes a weekend and costs far less than emergency repairs. Here's each critical step.
Step 1: Clean Your Motorcycle Thoroughly Before Storage
Start with a complete wash. Dirt, salt, and grime trap moisture against paint and metal, accelerating rust.
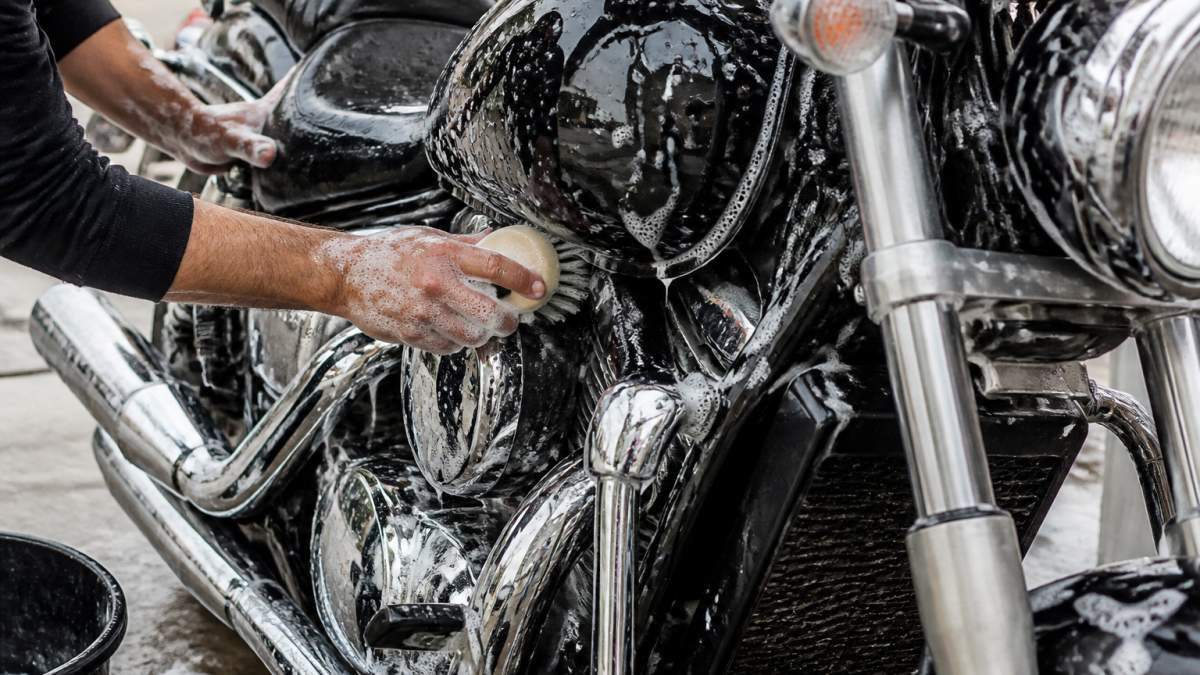
How to clean your motorcycle for storage:
- Wash with warm soapy water and a soft brush, focusing on the undercarriage, chain, and brakes
- Rinse thoroughly and dry completely with a microfiber cloth or compressed air
- Clean the chain with a dedicated cleaner or degreaser
After washing, wax painted surfaces to block moisture and salt, and apply a thin coat of protective oil to chrome and stainless steel.
Don't overlook the engine: blow dust and debris from the radiator fins, air filter housing, and cooling passages, which trap moisture and promote corrosion.
Step 2: Change Your Engine Oil and Oil Filter
Fresh oil is critical for winter storage. Old oil contains acids and contaminants that corrode engine internals when the bike sits unused.
Why this step matters: Used oil absorbs moisture that condenses inside a cold engine and rusts cylinder walls and bearings. Fresh oil resists this far better.
The process is straightforward:
- Run the engine a few minutes to warm the oil (it drains more completely)
- Turn off the engine, let it cool slightly, and place a drain pan under the drain plug
- Remove the drain plug, drain completely, then replace and tighten it firmly
- Remove the oil filter with a filter wrench
- Install a new filter, hand-tightening until the rubber gasket contacts the engine, then turn an additional three-quarter turn
- Add the recommended amount of fresh oil for your model
Consult your owner's manual for the exact oil specification, viscosity ratings and oil types vary by model.
Step 3: Stabilize Your Fuel with a Motorcycle Fuel Stabilizer
Gasoline degrades over time, forming varnish and gum deposits that clog injectors, carburetors, and fuel lines. A motorcycle fuel stabilizer slows that breakdown and keeps your fuel system ready to start in spring.
The right fuel procedure depends on your fuel system type and how long the bike will sit.
First, match the method to your fuel system
Fuel-injected motorcycles. Stabilizer is the default choice. Fill the tank, dose per the product label (concentrations differ by brand, so don't guess a ratio), and run the engine 10 to 15 minutes so treated fuel reaches the pump, lines, injectors, and fuel rail.
Carbureted motorcycles. You have a real choice, and it matters more because fuel sits in the float bowl where it can gum up jets and passages.
- Stabilize and run: Add stabilizer, run the engine so treated fuel fills the carburetor, then shut it off. Simplest option, works well for a few months.
- Drain the float bowl: After treating the tank, open the carburetor drain screw and let the bowl empty into a catch pan. Consult your owner's manual for the drain screw location and cautions.
- Run it dry: Some riders shut off the petcock and let the engine idle until it stalls. Check your manual first, some manufacturers advise against running a carbureted engine dry because it can lean the mixture at shutdown.
Then match the method to storage duration
- A few weeks to two months: A near-full tank with stabilizer and a short run is usually enough.
- Two to six months: Treat the fuel, fill the tank nearly full to minimize condensing air space, and run the engine to circulate the additive, the standard winter-storage case.
- More than six months, or unheated storage: Treat the fuel and consider draining carburetor bowls on a carbureted bike. On an injected bike, a full treated tank plus a battery tender covers most of the risk. If it will sit a year or more, ask a technician whether draining the system entirely is better for your model.
The fill-and-dose procedure
- Fill the tank nearly full, less room for moist air to condense against cold metal.
- Add stabilizer per the product label, not a guessed ratio.
- Run the engine 10 to 15 minutes so treated fuel reaches the injectors, fuel rail, or float bowl.
- Shut off the engine. On a carbureted bike, decide whether to leave the bowl charged or drain it.
- Cap the tank and note the date on your checklist.
What stabilizer does and does not do
Stabilizer slows oxidation and helps suspend moisture, but it won't rescue already-stale fuel or remove pooled water. If your bike ran poorly before storage, fix that first, stabilizing bad fuel just preserves a problem.
Consult your owner's manual for fuel specification, tank capacity, and manufacturer-specific storage instructions; the manual wins over general advice.
Step 4: Protect Your Motorcycle Battery for Winter Storage
A motorcycle battery loses charge during months of inactivity, especially in the cold, and a fully discharged battery can suffer permanent damage. Protection depends on battery chemistry and storage situation.
Know your battery type first
- Flooded lead-acid (conventional): Requires periodic electrolyte checks on serviceable models. Tolerant of a simple trickle charge but prone to sulfation if left discharged.
- AGM (absorbed glass mat): Sealed, maintenance-free, common on modern bikes. Accepts a float charge well and matches a quality tender.
- Lithium (LiFePO4): Common on newer bikes. Many conventional trickle chargers aren't compatible, use only a lithium-rated charger and check the manual, as some manufacturers advise removing the battery or using a specific maintainer. Never charge a frozen lithium battery.
If unsure which battery your bike has, check the label on the case or the owner's manual before connecting any charger.
Option 1: Remove the battery
Removing the battery is the simplest path if you have a safe indoor spot for it.
- Turn the key off and remove it.
- Disconnect the negative (black) terminal first, then the positive (red), this order reduces short risk if your tool touches the frame.
- Lift the battery out and inspect for cracks, swelling, or terminal corrosion. Clean terminals with a baking soda and water paste if needed, then dry.
- Store indoors in a cool, dry place, not on a damp concrete floor or a metal workbench where a dropped tool could bridge the terminals.
- Check voltage monthly with a multimeter. A healthy 12-volt battery at rest reads around 12.6 volts or higher; if it drops toward 12.0, recharge.
Option 2: Use a battery tender (maintainer)
A battery tender, also called a maintainer or float charger, holds the battery at full charge without overcharging. Unlike a trickle charger that keeps pushing current, a maintainer tapers off and resumes as needed.
Choosing a compatible tender:
- Match the charger to your battery chemistry. A lead-acid/AGM maintainer is not appropriate for a lithium battery unless the charger explicitly supports lithium.
- Look for a float or maintenance mode and automatic shutoff. A basic trickle charger without regulation can overcharge and damage a battery over months.
- Match amperage to battery size. A small motorcycle battery needs a low-amp maintainer, not a high-output charger.
Safe connection practice:
- Connect the leads to the battery terminals before plugging into the wall, positive to positive, negative to negative.
- Plug in and confirm the indicator shows the correct mode.
- Keep the charger and connections in a ventilated area, away from fuel, solvents, and anything that can spark.
- Route the cord so it can't be tripped over or pinched by a closing garage door.
- Check connections periodically, warm cables, a sulfur smell, or a hot battery mean disconnect and investigate.
Do not charge a battery in a sealed, unventilated space. Lead-acid batteries can vent hydrogen gas, which is flammable. Never smoke or use an open flame near a charging battery.
Which option fits your storage situation
- Heated garage, bike ridden occasionally: A maintainer on the installed battery is usually most convenient.
- Unheated garage above freezing: A maintainer works well, but check it periodically, a fully charged battery resists cold damage better than a discharged one.
- Unheated garage below freezing, or outdoor storage: Removing the battery and storing it indoors is safer, especially for lithium. Cold reduces a battery's ability to accept charge, and charging a frozen battery can damage it.
Whichever method you choose, don't let the battery sit discharged. Sulfation, lead sulfate crystals building on the plates, is the most common cause of premature battery failure and starts as soon as a battery drops below full charge.
Consult your owner's manual for battery type, removal procedure, and manufacturer cautions about charging, some bikes have specific disconnection requirements or advise against certain charger types.
Step 5: Check Tires, Lubricate Moving Parts, and Choose Dry Storage
Three final steps round out your motorcycle winterization: tire care, lubrication, and storage location.
Tire pressure and condition:
- Inflate to the cold pressure in your owner's manual, slightly overinflated (2-3 PSI above normal) to account for pressure loss over months
- Inspect for cracks, cuts, or uneven wear
- Tires can flat-spot if the bike sits in one position for months; consider wooden blocks under the frame to support weight more evenly
Lubrication:
- Apply a light coat of oil to the chain
- Lubricate moving parts: throttle cable, brake cables, kickstand and side stand pivots
- Apply a thin layer of protective grease to exposed fasteners and bolts
Storage location: Choose a dry, protected space. An unheated garage is acceptable if it stays dry; a heated garage is ideal.
Cover your motorcycle with a breathable powersports cover that allows air circulation while blocking dust and sunlight. Never use a non-breathable tarp, which traps moisture against the paint and promotes rust.
Creating Your Motorcycle Winter Storage Checklist
A written checklist ensures you don't miss a critical step. Print this list and check off each item before storage.
| Task | Frequency | Duration |
|---|---|---|
| Wash and dry motorcycle completely | Once before storage | 1-2 hours |
| Apply wax to painted surfaces | Once before storage | 30 minutes |
| Change engine oil and filter | Once before storage | 45 minutes |
| Add fuel stabilizer and run engine | Once before storage | 20 minutes |
| Disconnect or connect battery tender | Once before storage | 15 minutes |
| Check and adjust tire pressure | Once before storage | 15 minutes |
| Lubricate chain and moving parts | Once before storage | 20 minutes |
| Move motorcycle to dry storage location | Once before storage | 15 minutes |
| Cover motorcycle with breathable cover | Once before storage | 10 minutes |
This checklist takes roughly 4 to 5 hours. Break it into two sessions if needed: one for cleaning and fuel treatment, another for battery and tire work.
How to De-Winterize Your Motorcycle for Spring Startup
When spring arrives, de-winterization reverses the winterization steps and checks critical systems before you ride.
Spring startup steps:
- Reconnect the battery (or reinstall it if you removed it)
- Check all fluid levels: engine oil, coolant, and brake fluid
- Inspect tires for proper pressure and storage damage
- Test brakes before riding
- Check the chain for tension and lubrication
- Start the engine and let it idle several minutes to warm up
- Listen and feel for unusual sounds, vibrations, or handling issues
- Take a short test ride in a safe area before normal riding
If your motorcycle won't start after winter storage, don't force it. Turn the key to "on" and let the fuel pump run 5 to 10 seconds so fuel reaches the injectors or carburetor.
If you need advice on winterization for your specific model or have questions about storage options in your area, get a quote from our team, we're here to help you prepare for winter and get ready for spring riding.
Proper motorcycle winterization protects your investment and ensures you're ready to ride when warm weather returns. Following these five steps, cleaning, oil changes, fuel stabilization, battery protection, and tire care, prevents costly damage.
Frequently Asked Questions
Should you winterize your motorcycle?
Yes, winterizing your motorcycle is essential if you plan to store it for more than a few weeks during cold months. Proper winterization prevents fuel system gum buildup, battery discharge, corrosion, and flat spots on tires. Even if you live in a milder climate, stabilizing fuel and protecting your battery extends your bike's lifespan and ensures a smooth spring startup.
What is the best motorcycle fuel stabilizer to use?
Choose a fuel stabilizer specifically formulated for motorcycles and small engines. Follow the product instructions for the correct dosage based on your fuel tank capacity. Add the stabilizer to a nearly full fuel tank, then run the engine for 10-15 minutes to circulate the treated fuel through the entire system. This prevents varnish and gum deposits that can clog carburetors or fuel injectors during storage.
Should you remove the motorcycle battery for winter storage?
You can either remove the battery or leave it connected to a battery tender. Removing the battery prevents slow discharge over months of inactivity. If you leave it installed, use a battery tender (also called a trickle charger) to maintain charge without overcharging. Most riders find a battery tender more convenient since it requires no reinstallation work in spring.
How do you prepare a motorcycle for long-term winter storage?
Complete winterization involves cleaning the bike, changing oil and filter, adding fuel stabilizer, protecting the battery, checking tire pressure, lubricating the chain, and storing the motorcycle in a dry, protected location. Cover the bike with a breathable cover to prevent moisture and dust accumulation. Check on your bike monthly during storage to catch any issues early, and keep detailed notes using a motorcycle winter storage checklist for reference when de-winterizing in spring.